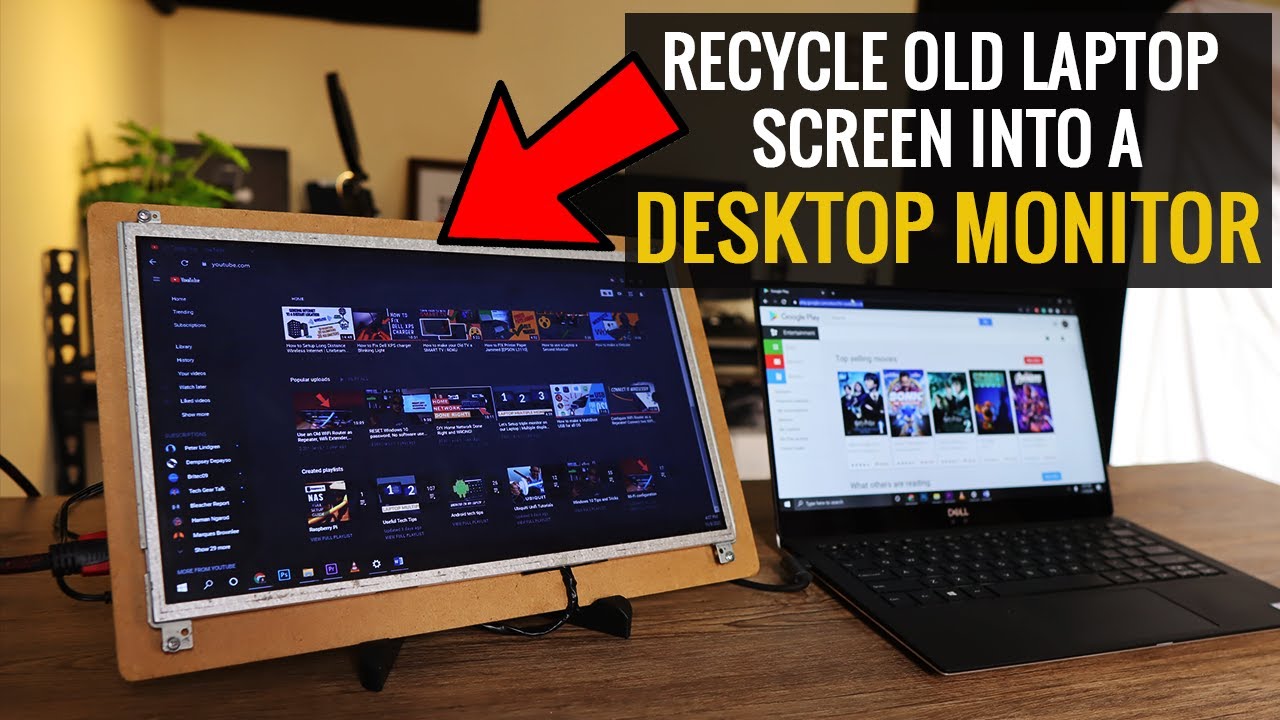
Cleverly Repurpose Old Laptop Displays: Transforming Them into Desktop Monitors!
Welcome to our blog post, where we’ll be delving into the fascinating world of repurposing old laptop displays! In the YouTube video titled “Cleverly Repurpose Old Laptop Displays: Transforming Them into Desktop Monitors!”, the creator takes us through a step-by-step process on how they built a DIY external monitor using an old laptop screen. Exciting, right? Not only is this a creative way to breathe new life into broken laptops, but it’s also an eco-friendly solution. So, whether you’re looking to use it as a secondary monitor or exploring other DIY projects, this blog post is packed with all the information you need. Let’s dive right in and discover the possibilities of repurposing old laptop displays!
– Repurposing an Old Laptop Display: A DIY Guide

In this DIY guide, I will show you how to repurpose an old laptop display and create an external monitor. This is a great project for those who are DIY enthusiasts and want to make the most out of their old laptops. Not only can you use the repurposed display as a secondary monitor for your laptop, but you can also explore other creative ideas for using this eco-friendly monitor.
To begin, you’ll need an old laptop with a working screen. It doesn’t matter if the laptop itself is broken or no longer functional, as long as the display is in good condition. Start by opening up the laptop, being mindful of any broken hinges or cracks. Carefully remove the LCD screen and unscrew it from the laptop. Make sure to unplug the cable at the back of the LCD screen. Take note of the model number and search for a compatible LVDS controller board online. This board will allow you to connect the LCD screen to other devices.
Once you have obtained the LVDS controller board, you may also need to purchase a power adapter if you don’t have one already. Ensure that the controller board is compatible with your LCD screen model by checking the product description or consulting with the seller. Additionally, consider getting some stand-offs, such as HDMI, DVI, or VGA cables, to secure the circuit boards. You can easily find these stand-offs in old computer sets or local stores. Another option is to use a cardboard or clipboa…
– Finding the Right Controller Board for Your Old Laptop Screen

Hey, guys! Today I want to share with you an exciting DIY project that involves repurposing an old laptop screen into an external monitor. Whether you have a broken laptop lying around or just an old one with a working screen, this project is perfect for you. Not only can you use the screen as a secondary monitor for your laptop, but you can also explore other creative projects with it. Imagine having your very own eco-friendly monitor for various DIY endeavors!
Let’s get started by dismantling the old laptop and removing the LCD screen. Since this particular laptop has been gathering dust for quite some time, we encounter some challenges like broken hinges and cracks on the sides. However, with a bit of patience, we are able to remove the screen without much difficulty. Once detached, we carefully unplug the cable at the back of the LCD screen. Remember to take note of the model number, as we will need it later.
Now comes the exciting part – finding the right controller board for our LCD screen. We head over to Amazon and search for “LVDS controller board” using the model number we noted earlier. It’s important to select a compatible controller board, so we take the time to read the descriptions and customer reviews. Additionally, we may need a power adapter for the controller board, but it’s worth checking if we already have one at home. If you’re unsure about any aspect of the purchase, don’t hesitate to ask the seller or read the comments from other customers.
Once we have everything sorted, the controller board and power adapter arrive, and we’re ready to assemble our DIY external monitor. The controller board features HDMI, DVI, and VGA ports, making it versatile for different devices. To ensure stability, we can use standoffs, which can be sourced from old computer casings or even a simple cardboard cutout. Now we have a customized external monitor, all thanks to our resourcefulness and a little bit of DIY magic!
Remember, finding the right controller board for your old laptop screen opens up a world of possibilities. So if you’re up for a creative project and want to give your old laptop screen a new lease on life, grab your tools and let your imaginations run wild!
- Setting Up the External Monitor: Tips and Tricks

Here are some tips and tricks for setting up your external monitor using a DIY method:
– First, disassemble the old laptop and carefully remove the LCD screen. Make sure to take note of the model number of the screen as you will need it to search for a compatible controller board online.
– Once you have the model number, search for an LVDS controller board on websites like Amazon. This board will allow you to connect your LCD screen to your laptop or other devices. Look for a description that matches your model number and check for compatibility with your desired devices.
- In addition to the controller board, you may also need a power adapter. If you don’t already have one, you can purchase it along with the board. Alternatively, check if you have a compatible power adapter at home before making a purchase.
– To secure and position the circuit boards, you can use standoffs like HDMI, DVI, and VGA connectors. These can be sourced from old computer cases or local stores. They will help keep the boards in place and ensure a stable connection.
– Finally, consider using a sturdy cardboard or clipboard as a makeshift stand for your DIY external monitor. This will allow you to prop up the screen at a comfortable viewing angle while you work or enjoy media.
With these tips and tricks, you can repurpose parts from an old laptop and create an eco-friendly external monitor that suits your needs. Whether you use it as a secondary monitor for your laptop or for other DIY projects, this homemade monitor can be a practical and cost-effective solution.
– Creative Ideas for Repurposing Old Laptop Displays

If you have an old laptop that’s no longer functional, don’t throw it away just yet! There are so many creative ideas for repurposing the display and giving it a new life. One great idea is to turn it into a DIY external monitor. All you need is a laptop screen that’s still in working condition, and you’re good to go!
Not only can you use it as a secondary monitor for your laptop, but you can also explore other innovative projects with it. This repurposed display can become an eco-friendly monitor for various DIY projects. Imagine the possibilities! Whether you’re a tech enthusiast or just love being creative, repurposing an old laptop display can be a fun and rewarding endeavor.
To begin, you’ll need to disassemble the laptop and carefully remove the LCD screen. Remove any screws and cables that connect the screen to the laptop. Make sure to note down the model number, as you’ll need it when searching for a compatible controller board online. Once you’ve found the appropriate controller board and power adapter, you can connect them to the screen. This will allow you to use the display as a standalone monitor with HDMI, DVI, and VGA ports. To mount the circuit boards, you can repurpose items like standoffs from other devices or use a sturdy cardboard frame. Get creative and have fun exploring the possibilities with your newly repurposed laptop display! In conclusion, repurposing old laptop displays into desktop monitors is a clever and eco-friendly DIY project that can bring new life to your outdated technology. Not only can you use the repurposed monitor as a secondary display for your laptop, but you can also get creative and find other projects where it can be used.
The process of repurposing a laptop’s LCD screen involves removing it from the old laptop, searching for a compatible controller board online, and obtaining a power adapter for the board if necessary. Taking note of the model number is essential for finding the right controller board. It’s always good to read customer reviews and ask questions before purchasing any components to ensure compatibility.
Once the necessary components are obtained, assembling the repurposed monitor is a matter of connecting the controller board to the LCD screen and powering it with the adapter. Additional support for the circuit boards can be achieved using standoffs from other devices or simple items like a cardboard clipboard.
The end result is a DIY external monitor that can be used for various purposes, providing a sustainable alternative to purchasing new equipment. So, embrace your inner DIY enthusiast and give your old laptop display a new lease on life. Not only will you save money, but you’ll also contribute to reducing electronic waste. Get creative, repurpose, and enjoy your new desktop monitor!